Wednesday, August 15, 2018

How To Fix A Clothes Dryer That Won’t Turn On

Like any other household appliance, even your dryer can develop a malfunction without advanced warning. turning on dryer
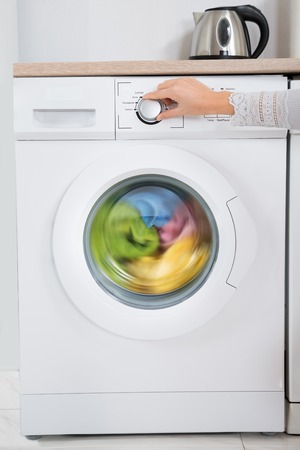
One of the problems that you are likely to face with this home appliance is the machine not turning on. Diagnosing this problem is usually more difficult than fixing the problem. The machine has several components that can fail, which can cut the power supply to the heating element, the motor, or both. This failure may be due to wear, age, or improper use of the machine. Some of the problems can be addressed without getting professional help, for others, you may have to use the services of a dryer service technician. Here are some tips to help you solve the problem:

Check Power Supply

Your electric or gas dryer must be plugged into the electric socket and the breaker that controls the socket must not trip. If you use a gas dryer and you have plugged the machine into a 120-volt ground fault-interrupting socket, the socket itself may have tripped. You can reset the socket by pressing the reset button. If you are using a circuit that is shared by other house appliances, then a problem in one of the appliances can trip the common circuit, which can cut the power supply to the dryer.

Start and Door Switch

man checking dryer
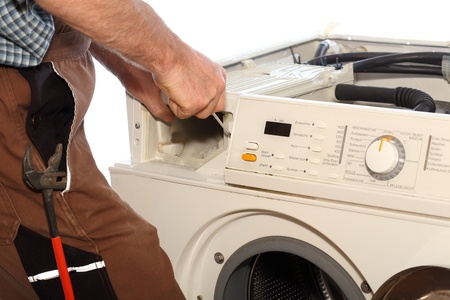
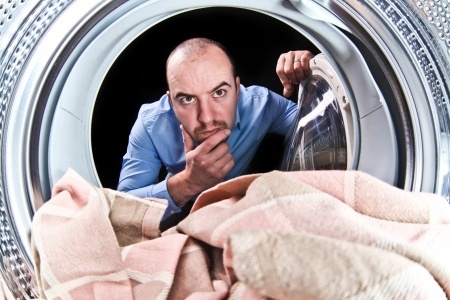
A problem with the start or door switch can prevent the machine from starting. The door should make a click sound when closed, if it does not, it is an indication that there is a problem with the switch. You can check the condition of switch using a multi-meter. To gain access to the starter switch, you must lift the control panel cover. To do this, you must remove the screws that fix the cover to the machine. The door switch is usually mounted on the machine housing and you can access it without removing the control panel cover. If your switch is faulty, you must replace it immediately.

Thermal Fuse

Most modern dryers have a thermal fuse, which is mounted on the heating chamber. When this switch blows off, it can disrupt the main power supply. This switch usually blows when the temperature inside the machine is too high. To gain access to the fuse, you must remove the back panel or cover. You can check the continuity of the fuse using a multi-meter. If it is blown, you can replace it easily. Once you replace the fuse, find out why the machine is getting overheated. If you don’t identify the cause, the machine will get heated and the fuse will blow once again. Some of the common causes of machine overheating include fan not working, blocked vents, or the dryer has limited space around it.repair man repairing dryer

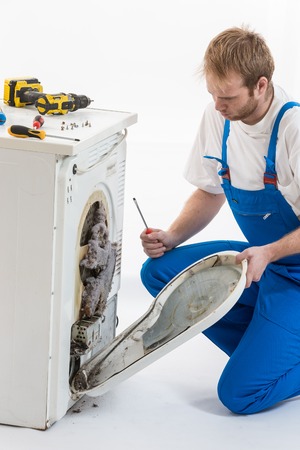
Other Common Problems

If you hear a humming sound when the machine starts, it could be due to a faulty drive motor or broken drive belt. In some models, the machine will not start if the drive belt is broken, while in others, the machine will start but the tumbler will not turn. Replacing the problem part should solve the problem. If these steps don’t help, it is best to call a professional to repair the machine. Calling a fridge repairman, a microwave technician, a washer technician, or an oven repair technician, who also offers dryer repair service, may not help. It is in your interest to call a professional who is a specialist in the field.

Locations We Also Serve In These Popular Cities:

Kansas City, Tacoma, Billings, Salt Lake City, Little Rock, Columbus, Portland, dryer repair Atlanta, Oklahoma City, Tallahassee, Omaha, Colorado Springs, Baltimore, New York City dryer repair, Orlando, Silver Spring, Indianapolis, Philadelphia dryer service, Virginia Beach, Milwaukee, Pittsburgh, Providence, Henderson, Lakewood, Fort Worth, Raleigh, Tucson, Aurora, dryer service Phoenix, San Francisco washer & dryer repair, Los Angeles washer and dryer repair, Albuquerque, washer & dryer service San Diego, Detroit, Seattle, Eugene, San Antonio, Columbia, San Jose washer & dryer service, Birmingham, Dallas, Provo, Minneapolis, New Haven washing machine repair, Houston, Jacksonville laundry dryer repair, Tampa, St. Louis, Boston, Charlotte laundry washing machine repair, Charleston clothes dryer repair, Allentown, Everett, Olympia, laundry dryer repair Sacramento, Denver, clothes dryer service Las Vegas, Middletown laundry dryer service, Miami, Richmond, Jackson, Chicago, Nashville, Baton Rouge, Newark, Reno City, Cleveland, Manchester, Austin, Louisville, Portland, Bowie

The post How To Fix A Clothes Dryer That Won’t Turn On appeared first on OnSite Appliance

How To Fix A Gas Range or Stove Igniter That Won’t Light

onsite_appliance_gas_stove

Having a range or stove that does not ignite can be a huge problem, especially if you have guests at home. Fixing a stove or oven is not easy, as it involves high voltage checks that must be performed by trained stove repairman. If the range or stove is not working, you should ideally call a reputed stove service technician who will visit your home to repair or service the household appliance.

If you don’t know a good range technician in your area, you could attempt range repair without professional help. To repair a broken appliance, you must know the parts that could be responsible for the problem. Once you identify the problem part, all you have to do is repair or replace the part. This should solve your problem. Here is a look at some of the parts that could prevent your range or stove from igniting.

Hot Surface Igniter

This part is used in most burners to open the safety valve and ignite the gas. The igniter uses electric current to glow and heat to a high temperature. Also, it causes the safety valve of the oven to open and release gas that is to be ignited. This process is usually completed in less than a minute. The size and shape of the igniter will vary depending on the model. The igniter is very fragile and can be easily damaged due to regular use.

If your burner does not light, the first part you must check is the igniter. If there is no power supply to the circuit the igniter will not glow. onsite_appliance_gas_stove_repair
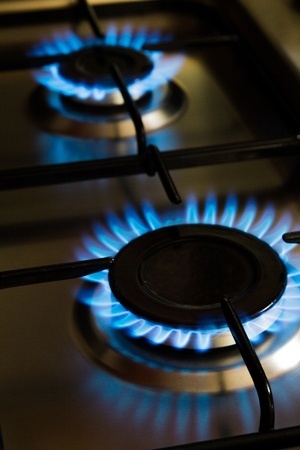
Therefore, it is important to check the power to the circuit when the igniter does not glow. This involves live voltage checks and it must be performed by qualified technicians. If there is no disruption of power supply to the circuit, you must check the condition of the circuit using a multi-meter. In case, the igniter is glowing, but the burner is still not lighting, it means that the igniter is weak and it is not able to draw enough power to open the valve. To do this check; you will need an amp meter. Also, this check must be done by a qualified technician. If the igniter is weak or damaged, it must be replaced immediately.
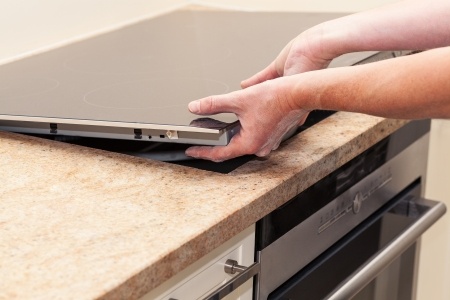
Oven Safety Valve

The gas or safety valve of the range is the part that prevents the gas from releasing until the igniter has reached the right temperature required to ignite the gas. If the range does not light, the safety valve can be faulty. However, the chances of this part failing is low. When the igniter does not light, you should first check whether there is a proper power supply to the circuit. Since this is high voltage check, it should be performed by a qualified technician. If you find that power is lost at the terminals, you should use the multi-meter to check the continuity of bi-meter in the safety valve.

onsite_appliance_stove_technicianElectronic Controls

Most oven functions are controlled by the electronic control board of the machine. The machine uses the control board to open and close the safety valve. If there is no power supply to the igniter circuit, you should check the condition of the control board. When checking the control board, find out if there is a power supply at the output relays. This is a live voltage check and it must be performed by a qualified repairman. If there is no power supply to the igniter circuit, you must replace the electronic control of the machine.

Temperature Sensor

The temperature sensor is an important part of the range, which regulates the temperature of the machine. One of the reasons why the machine is not igniting is because the temperature sensor is faulty. The sensor is usually located on the rear wall of the machine. In most modern ovens, a fault code is displayed when the sensor is faulty. Checking the condition of the sensor is not easy. If you want to check the condition of the sensor, you must know the current resistance of the sensor.

To check most parts of the range, you must perform high voltage checks. These checks must be performed by technicians who are qualified to repair residential appliances. Using the services of a qualified person will ensure your safety and the safety of your family members.

We Offer In-Home Service in these Popular Cities:

range repair Phoenix AZ, Orlando, Silver Spring, Sacramento range service, Albuquerque, Olympia, Chicago, Everett, Little Rock, Columbia, Lakewood, San Jose stove repair, Allentown, Portland, stove repair Los Angeles, Pittsburgh, Detroit, Reno Citygas range repair Atlanta, Louisville, Eugene, Tacoma, Boston, Colorado Springs, gas stove service Jacksonville, Raleigh, Denver, Tucson, Jackson, Columbus, Newark, Richmond, Dallas, Indianapolis, range service Middletown, Milwaukee, Omaha, Provo, Fort Worth, Seattle, Oklahoma City, Virginia Beach, Miami, Providence, oven repair San Diego CA, Salt Lake City, St. Louis, appliance repair New York City, Tampa, Las Vegas gas range service, Charleston gas stove service, Austin, Charlotte appliance repair, San Antonio, Billings, Aurora, Houston, Birmingham, Minneapolis, appliance repair San Francisco, Henderson, Manchester, Kansas City, Nashville, Tallahassee, Cleveland, Bowie, Baton Rouge, Baltimore, appliance repair New Haven, appliance repair Philadelphia, Portland

The post How To Fix A Gas Range or Stove Igniter That Won’t Light appeared first on OnSite Appliance

How to Fix a Noisy Washer

Washer technician fixing the damaged washer
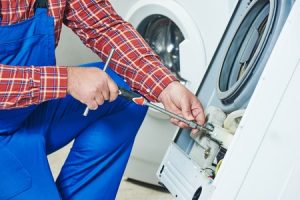
Washing machines have now become an integral part of our household. It is used to wash dirty clothes, especially those that are stained by kids. However, life becomes challenging and miserable when the washing machine is noisy or stops working. If the machine you have in your house is making strange noises, you could get help from washing machine repairman. Alternately, you could try to repair or service it without getting professional help. If you are planning to fix a machine that is noisy, here are a few parts that are likely to cause this problem.

Pump Set

The primary function of the drain pump is to pump water from the wash tub during and before the spinning cycle. The pump of the washing machine is motor driven, belt driven or may have its electric motor. If you hear sound during or after the spinning cycle, it indicates that drain pump is defective.

To locate the pump, you must remove the cabinet or front panel of the machine. Be extremely careful when removing these parts, as you may be exposed to electrical circuits and moving parts. Before checking the condition of the pump, disconnect the power supply to the machine and remove the inlet hose. At times, eliminating foreign objects from the pump set will solve the problem. If a part is worn out or damaged, replace the part immediately and tighten the hose clamps. If this does not address the problem, it is best to call a washer service technician.

Drive Belt

Some top-loading washing machines use the drive belt to connect drive motor to the transmission. In front loading machines, the drive belt is used to connect the drive motor to the wash basket. Most washing machines you use in your home have multi-rib or V-shaped drive belt made of rubber. If the drive belt is damaged or worn out, you must replace it.

Washer repairman holding the motorDrive Motor Coupling

Some washing machines use motor drive coupling to transfer power from the engine to the transmission. The drive coupling consists of two drive forks with a rubber coupling between the forks. One fork is attached to drive motor shaft and the other to the transmission input shaft. When the shaft motor rotates, the rubber coupling between the forks absorbs the torque to prevent the drive forks from breaking.

Regular use of the washing machine can damage the coupling, which can cause the forks to slip and make a vibrating noise. If the spin basket cannot turn freely or the transmission seizes, it indicates the coupling has failed. Most washing machine models will require you to remove the cabinet or the machine to access the drive coupling. Before attempting any repair, make sure you disconnect the power supply to the device.

Shock Absorbers

Washing machines have shock absorbers that dampen the tub movement in the machine spin cycle. These shock absorbers are usually attached to the outer tube and the base frame. To access these shock absorbers, you must remove the front or the rear panel. When shock absorbers are damaged or worn out, the machine will make loud noises. If the symptoms are not corrected, it can damage other parts of the washer. If the shock absorbers are damaged, you must take steps to replace them immediately.

Tub Dampening Strap

Some machines come with tub dampening straps that cushion the movement of the wash tub during the spin cycle. Most models have four straps that attach the wash tub to the four corners of the machine. Since these straps are made of rubber, they can get damaged due to excessive use. At times, the straps may get damaged when residential users overload the machine. When the straps are damaged, you can hear loud banging sound when the tub rotates. To solve this problem, you must raise the top of the machine to check the condition of the strap. If even a single strap is damaged, it is best to replace all the four straps at the same time.

Drive Motor

On a top loading machine, the drive motor is used to spin the wash basket and to operate the transmission and pump. If you use a front load washing machine, the drive motor is used to run the belt that controls the operation of the wash basket pulley. One of the symptoms of failing drive motor is a buzzing or humming sound when the machine starts. Identifying the exact cause of the problem in the drive motor is not easy. You will need several tools to analyze and rectify the problem. It is in your interest to use the services of the washing machine service technician to correct the problem.

Pulley

Washer technician checking the pressure switch
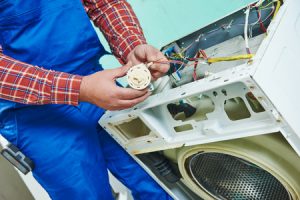
If you use a belt driven machine, the pulley supports the drive and the pump belt. The pulley can accumulate a build-up of rubber compounds, grease, or dirt which can cause a thumping or squealing sound when the machine operates. If you hear these sounds when the engine is spinning, draining, or agitating, you must check the condition of the pulley. Make sure the pulley is smooth and clean and there are no signs of distortion.

Pump Belt

The pump belt of the machine drives the pulley of the drain pump. Age and regular use of the pump belt can cause it to become frayed or cracked, which can create a thumping or squeal sound during the spin or drain cycle. This may be accompanied by an incomplete drain or burning rubber smell. Check the belt for signs of abrasion, overheating, or wear and tear. If the belt is damaged, you must replace it with the exact replacement belt. Using the wrong belt can damage other parts of the machine.

Tub Bearings

These bearings allow the inner tub or wash basket to rotate freely. Most top loading washers have a bearing at the point where the shaft is attached to the inner tub and another at the bottom of the tub. The tub seal protects the bearing from the wash water. Regular use of the machine can cause the seal to break down, allowing the water to enter the bearing and eventually damaging it. If you hear a roaring or rumbling sound in the spin cycle, it usually indicates the failed tub bearing. Replacing a damaged bearing is not easy. To solve this problem, it is best to get help from a washer technician.

Clutch Assembly

The clutch assembly helps in locking the transmission input shaft to the wash drive during the spin cycle. Repeated friction of the clutch can cause it to wear and create a scraping sound. When the clutch is damaged, it prevents the machine from spinning. You may also notice loud noise or burning smell during the spinning cycle when the clutch is damaged. If your appliance displays any of these symptoms, you must visually check the clutch for signs of damaged. You can find the clutch below the outer tub, and it is attached to the driving basket. To access the clutch, you must remove the cabinet, drive motor, and transmission assembly.

Other Locations We Service In Popular Cities:

Henderson, Manchester, Philadelphia dishwasher servicemen, dishwasher repair San Diego CA, New Haven dishwasher appliance repair, Chicago, Kansas City, Virginia Beach, Fort Worth, San Francisco dishwashing machine service, Atlanta kicthen appliance repair, Jacksonville dishwasher service, Albuquerque, Seattle, Tampa, Detroit, San Antonio, Colorado Springs, Lakewood, Allentown, Orlando, Louisville, Portland, Milwaukee, Newark, Cleveland, Baltimore, Little Rock, Tacoma, New York City, Raleigh, Pittsburgh, Eugene, dishwasher repairs in Charleston, Middletown NJ appliance technician, Columbus, Everett, Richmond, Dallas, Oklahoma City, Omaha, Minneapolis, St. Louis, Jackson, Denver, San Jose dishwashing machine repair, Las Vegas Nevada dishwasher repair, Indianapolis, Salt Lake City, Columbia, Bowie, Billings, appliance repair Tucson Arizona, Baton Rouge, Houston, Provo, Silver Spring, Providence, Phoenix home appliance repair, Tallahassee, Austin, Boston, Reno City, Aurora, Birmingham, Olympia, Nashville, appliance service Charlotte North Carolina, Sacramento CA appliance repairman, Portland, Miami, Los Angeles CA appliance service

The post How to Fix a Noisy Washer appeared first on OnSite Appliance

How To Troubleshoot Refrigerator Light That’s Not Working

If you own a refrigerator, you must be aware of the fact that when you open the fridge door the light comes on. This light is important for most people, especially those who use the household appliance for their midnight snacks. But what are your options when this light does not turn on when you open the door? If you face such a situation, the best option is to troubleshoot the problem.

discussing fridge light problemElectric Supply

At times, the bulb not burning may be a symptom of a much bigger problem in the home appliance. For instance, the bulb may not burn because there is no electric supply to the machine. There are a few causes for this problem and you can fix these problems by following these simple steps.

First, you must check if there is electricity in the house. When there is a power outage, electric supply to both the machine and the light will be interrupted. If the electric supply to your house is cut, you must keep the doors closed to ensure that food kept in the residential appliance is cool for a prolonged duration.

Second, you must check if the machine is plugged in properly. There is a high probability that you may have accidentally removed the plug from the socket. If the refrigerator is not plugged in properly, you must push the plug completely inside the socket.

The third possible cause of the problem is the fuse blowing out. At times, the circuit breaker can overload and can trip. This can stop electric supply to the machine. To troubleshoot this problem, you must locate the home circuit board to check every circuit breaker. If the circuit breaker has tripped, switch it back on. Avoid adding too many appliances to a single circuit breaker, as it will overload and trip off again.

The bulb not burning may be due to frayed electric cord. If you have checked all other possible causes of the problem, but did not find any problem with the machine or its wiring, you must check the condition of the electric cord. At times, the electric cord can become damaged or frayed. If this is the problem, you should get help from a professional who will replace the cord. Today, there are several technicians such as dryer repairman, oven service technician, stove technician, ice maker repair technician and of course fridge technician, who will visit your place to repair or service your broken appliance.

Bulb Burned Out

The light bulb may not come on because it has burned out or reached the end of its lifespan. If you notice broken filaments or dark area in the bulb, you must change the bulb immediately. The replacement bulb is usually available at the local hardware store. Before changing the bulb, disconnect the power supply to the machine. When replacing the bulb, check the condition of the socket that holds the bulb. If it appears to be damaged or dirty, make sure you replace it or clean it to solve the problem.

Light Switch Stuck

At times, the bulb may be fine but it does not come on because the light switch is stuck. The light is usually operated by the button that activates when the door opens. Over time, this button could get stuck due to the build-up of dirt and dust. Cleaning the button with a moist cloth should solve the problem.

Here Some Of  The Popular Cities We Service:

Minneapolis, fridge repair San Diego, freezer repair in Charlotte, home appliance service Philadelphia, Orlando, Tacoma, Portland, Detroit, Los Angeles refrigerator repair, Colorado Springs, Phoenix AZ refrigerator service, Milwaukee, Las Vegas fridge repair, Everett, Little Rock, Provo, Cleveland, Albuquerque, Middletown fridge repair, Columbia, Chicago, San Antonio, Fort Worth, Raleigh, Billings, Oklahoma City, Lakewood, Omaha, Seattle, Boston, refrigerator repair New Haven, Baton Rouge, freezer repair New York City, Bowie, Baltimore, Columbus, Denver, Tampa, Atlanta GA fridge repair, appliance repair Tucson, St. Louis, Jacksonville appliance service, Miami, Manchester, Providence, Olympia, Richmond, appliance repair San Jose, Virginia Beach, Pittsburgh, Jackson, Reno City, Aurora, Portland, Newark, Tallahassee, San Francisco refrigerator service, Indianapolis, Nashville, Henderson, Silver Spring, Houston, Charleston SC freezer repair, Birmingham, Dallas, Austin, Salt Lake City, Kansas City, freezer service in Sacramento, Eugene, Allentown, Louisville

The post How To Troubleshoot Refrigerator Light That’s Not Working appeared first on OnSite Appliance

How To Fix A Washer That Does Not Agitate

onsite_appliance_washer_and_clothes

A washer that does not agitate can mean disaster for most homes, especially during winters when they want to finish their chores quickly. Ideally, most homeowners would call their washing machine repairman to troubleshoot the problem with their residential appliance. However, if you want to save a few bucks, you can try to repair the machine without any professional help.

To repair a broken washer, you must identify the problem part and repair or replace it to solve the problem. In this article, we have given a list of parts that are likely to prevent your washer from agitating. You must identify each part carefully and replace the problem part immediately. If replacing or repairing the part does not help, you should get help from a qualified washer technician.

Agitator

The agitator is responsible for moving your clothes through the detergent and water and it’s driven by the output shaft. The agitator of the washer is a single or two piece unit depending on your model. If the agitator of the machine does not oscillate back and forth, it indicates that the spline may be broken or damaged. To check the condition of the agitator and the spline, you must remove the retaining device that connects the agitator to the machine base.

Directional Cogs

At times, the upper portion of dual-agitator can get separated from the bottom portion. The upper portion of the agitator is made of a hard plastic, which can wear out due to regular use. If the directional cogs don’t turn while agitating or makes a grating sound, it must be replaced. Replacing the cog is not easy, as you have to dissemble several parts of the washer. To repair or replace the cog, you must get help from a washing machine service technician. They have all the required tools to service your household appliance.

Cap, Coupler, & Bolt

Some washers have a coupler between the agitator and the transmission shaft. If you hear a grinding sound when the machine is in operation and the agitator is not damaged, it indicates that the coupler may be damaged. To check the condition of the coupler, you must remove the agitator. Once the agitator is removed, you must unthread the retaining device and remove the coupling. Before replacing the damaged coupling, make sure the splines on the shaft is free from dust and rust. When replacing the coupler, use the new gasket and bolt that come with the coupler.

Direct Drive

The drive motor transfers the power from the machine motor to the transmission. The drive forks are connected to the transmission input shaft and drive motor shaft. The coupling between the drive forks absorbs the torque, which prevents the fork from getting damaged when the shaft rotates. When the coupling is damaged, the machine will fill and drain properly, but the machine will not spin or agitate. To access the drive shaft and assembly, you must remove the cabinet.

Drive Belt

At times, a problem with the drive belt can prevent the machine from agitating. You must remove the cabinet to inspect the condition of the belt. If the belt is worn out, it will create a noise or cause a burning smell when the machine is in operation. You must ensure that the drive pulley turns freely and both the pulley and motor are clean. Make sure the idler assembly is freely moving and operates properly before you replace the defective belt. If the belt is worn out, make sure you use the exact replacement belt as specified by the manufacturer.

Transmission

The transmission of the machine is responsible for converting the rotating motion of the drive motor to the back and forth movement of the agitator. If the drive shaft of the agitator does not oscillate, you must first verify the condition of the input shaft. If the shaft is turning properly, but the agitator does not turn, it indicates that transmission is faulty. If the transmission is faulty, the complete set must be replaced. You may also have to replace the tub seal, as it can get damaged when replacing the transmission.

A few other parts that are likely to prevent the washer from agitating include:

  • Drive motor
  • Timer
  • Lid switch
  • Water level switch
  • Selector switches

If you don’t find any problem with these parts, it is best to call a washer repair technician. The technician will visit your house and try to solve your problem in the shortest possible time.

We Service Other Sites In These Popular Cities:

Omaha, Seattle, washer repair Phoenix, Silver Spring, washer and dryer repair San Jose, Newark, Indianapolis, Lakewood, Allentown, washer & dryer repair Los Angeles, Reno City, Miami, San Antonio, Baltimore, Raleigh, Columbia, Tucson, St. Louis, San Francisco washer repair, Philadelphia washer and dryer repair, Fort Worth, New York City washer & dryer repair, Columbus, Providence, Aurora, washing machine repair Sacramento, Eugene, Detroit, Chicago, Middletown washing machine repair, Henderson, Colorado Springs, Oklahoma City, Tampa, Austin, Jackson, Orlando, Milwaukee, Billings, Louisville, dryer repair Charlotte, Salt Lake City, Albuquerque, Dallas, Portland, New Haven dryer repair, Bowie, Baton Rouge, Richmond, Houston, Cleveland, Pittsburgh, Boston, Nashville, Everett, Jacksonville appliance repair, Kansas City, Virginia Beach, Birmingham, Olympia, Provo, Manchester, Atlanta washing machine service, Charleston washer repair service, appliance service San Diego, appliance repair Las Vegas, Minneapolis, Tallahassee, Little Rock, Tacoma, Portland, Denver

The post How To Fix A Washer That Does Not Agitate appeared first on OnSite Appliance

How To Fix A Freezer That Is Running But Not Freezing

Most household appliances tend to breakdown at the most inconvenient time. Have you noticed that your refrigerator stops working when you are expecting guests at home or in the middle of summers, when you want to store your favorite dish in the refrigerator? Not that appliance malfunction at any other time is good – especially the washer and freezer. At these times, you should be able to identify the problem with the machine and take steps to troubleshoot the problems. If you are unable to identify and solve the problem, you should get help from a residential appliance repair technician. Today, there are many companies that will send dryer repairman, stove technician, freezer technician, oven service technician, and several other technicians to your house to troubleshoot the problem with your appliance.

man checking freezer
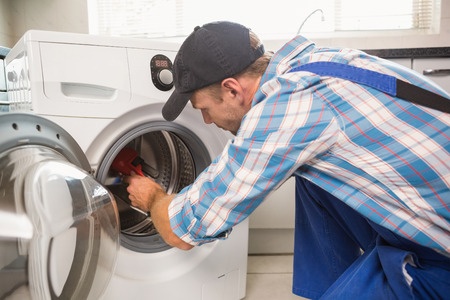
One of the appliances that can affect your daily routine is a broken freezer. Here are some steps you can take to troubleshoot the problem with your freezer.

Testing the Machine

Even if the freezer is working perfectly, it will not be able to maintain the frozen food when the door is not closed properly. So, make sure you check the condition of the door before you check the condition of other parts. Also, using the freezer to cool hot items or opening the freezer frequently can affect the cooling. At times, placing the contents in the front of the evaporator fan can prevent it from circulating air, which can affect the cooling. Once you have checked the condition of the door and the items inside the freezer, check the temperature inside the freezer using a thermometer. The temperature should be about zero degrees Fahrenheit.

Door Seal

Problem with the door seal can affect the working of the freezer. To test the condition of the door seal, put a dollar bill between the freezer and door. Now, close the door and check if you can pull out the bill. If you are able to pull out the bill, then there is something that is interfering with the seal. Dirty seals must be cleaned and damaged seals must be replaced immediately.

Other Repairs

If your freezer is running properly but it does not cool, you should remove debris, ice, or dust that may smother the coil. Ice formation can be removed from the coil using a hair dryer. Once the ice melts, you can use a soft cloth to remove moisture and dust from the coil. If you notice water on the floor when the freezer is running, you should check for problems in the drain tube. If the tube is blocked, you can use bleaching water to clean the tube and push out the debris.

Repairing the Coolant System

It is not easy to repair the internal cooling system. It involves checking and replacing dangerous parts and attempting to repair it without professional help can be dangerous. Also, repairing some parts require specialized knowledge and tools. Some parts that belong to the internal cooling system include the evaporator fan, door safety switch, thermostat, defrost control timer, and the failing evaporator. Evaporator fans that squeak and chirp or refuse to circulate air can prevent the freezer from cooling. Likewise, a problem with the door switch is not easy to locate and you must not attempt to repair or service it without professional help.

Check Out The Popular Cities We Cover and Service:

Tampa, Oklahoma City, Chicago, Newark, Allentown, Seattle, Omaha, Portland, Fort Worth, Reno City, Minneapolis, St. Louis, Salt Lake City, Denver, Little Rock, Albuquerque, Birmingham, Austin, Raleigh, Los Angeles freezer repair, fridge repair Tucson, freezer repair Charlotte, Houston, Bowie, refrigerator repair San Diego, Everett, freezer service Sacramento, Columbus, Richmond, Manchester, Jackson, Lakewood, Milwaukee, Olympia, Eugene, fridge service Philadelphia, San Francisco freezer service, refrigerator & freezer repair New Haven, Louisville, Portland, Phoenix AZ freezer service, Billings, Indianapolis, Kansas City, Silver Spring, Colorado Springs, Providence, San Antonio, Miami, Middletown NJ fridge repair, Las Vegas fridge repair service, Tacoma, Pittsburgh, Columbia, freezer repair in New York City, Henderson, Detroit, Virginia Beach, Aurora, Nashville, appliance repair in San Jose, Provo, Boston, Baltimore, Jacksonville FL appliance service, Baton Rouge, Dallas, Charleston SC freezer service, Orlando, Tallahassee, Cleveland, Atlanta GA refrigerator repair

The post How To Fix A Freezer That Is Running But Not Freezing appeared first on OnSite Appliance

How To Fix A Range Or Oven That Won’t Start

father and daughter waiting near the kitchen oven
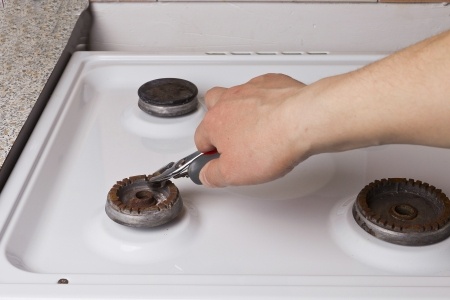
Cooking appliances such as ovens, ranges, and microwaves are the heart and soul of the kitchen. These machines are critical for cooking, and our home is incomplete without these appliances. For this reason, it is important to have devices that operate efficiently and appropriately. Repairing an oven, stove, or range that is not working properly is not difficult if you know which part to repair or replace. Identifying the problem part and replacing it will require right tools and specialized knowledge. If you are repairing the kitchen appliance for the first time, it is best to get help from a professional. Some of the parts that are likely to affect the normal functions of these household appliances are:
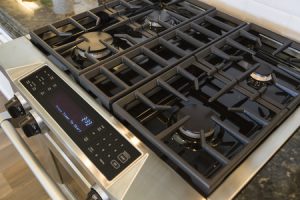
Fuses

The internal fuse of the oven can blow when there is a problem with the components or the wiring of the appliance. If the fuse of the machine is blown, it indicates that a component has failed or shorted, which needs to be corrected. The ovens, we use in our house, usually, show the circuits that can be affected by the fuse. If the fuse of the oven is blown, you check the condition of the element and the wires that are connected to the circuit. When changing the fuse, don’t replace the fuse rating, as it can damage the machine. When attempting to replace the fuse, make sure you disconnect the power supply to the range.

Broil Element

This part is usually located at the top of the oven, and it produces high heat for broiling. If you suspect that broil element is not working, you should visually check the broil element for signs of external damage. If there are no signs of external damage, you can test the continuity of the element using a multi-meter. Remove power supply to the machine before performing this test. If there is no continuity, you must replace the part.

If the broil element is in perfect condition, you must check the wires that are connected to the broil element. You must remove the back panel to inspect the terminals and the wires. If the wires are damaged, they must be repaired or replaced. A problem in the broil circuit can also prevent the broil element from producing high heat. You must check the broil circuit to identify the cause of the problem. This involves high voltage tests, which must be performed only by a qualified gas range repair technician.

beautiful new modern natural gas range stoveBake Element

This heating element is usually found at the bottom of the machine. Most modern ovens use both broil and bake element in a bake cycle, with the bake element performing most of the heating. If there is a problem in the bake element, the oven may not heat. To check the condition of the bake element, you can start by doing a visual check. If the element is separated or blistered, then it should be replaced.

If the element is cold when the machine is switched on, it indicates that there is a problem with bake element, its wiring, or circuit. To check the condition of these parts, disconnect the power supply to the machine. You can test the condition of the element using a multi-meter. If the element does not have continuity, it must be replaced. Checking the wiring and the circuit involves high voltage tests. These tests must be performed by a qualified range repairman.

Surface Burner Element

The surface burners are usually solid, coil, or ribbon type. This element consists of a heating wire that uses electricity to generate heat. If coil type element is utilized in the machine, you can check its condition using a multi-meter. If the element is in perfect condition, visually inspect the terminals for signs of corrosion or damage. Damaged terminals must be replaced immediately. Make sure you disconnect the power supply to the machine before replacing the terminal block. 

If solid or smooth top element is used, you must remove the main top to gain access to the element. You must disconnect the power supply to the machine before removing the main top. After removing the wires that are attached to the element, use a multi-meter to check its continuity.

Temperature Sensor

The temperature sensor is used to regulate the temperature of the oven. If the sensor is not working properly, the oven will not start. Most ovens will display a fault code when the sensor is faulty. Checking the condition of the sensor is not easy, and it must be done by a qualified range service technician. Getting help from a professional is easy, as there are may range repair technicians that offer repair and service in both residential and commercial areas.

Infinite Switch

The switch controls the power supply of all surface elements. If you don’t have heat in an element and the terminal block, and the element checks ok, then you must test the condition of the infinite switch. Before checking the status of the switch, disconnect the power supply to the machine. Remove the back panel and check the status of the switch and the terminals. If the switch is in perfect condition, check for proper voltage to the infinite switch. This live high voltage test must we performed only by professionals.

satisfied female customer with oven repair billElectronic Control Board

Most oven functions are controlled by the electronic control board. Some of the parts controlled by the board include the safety valve, broil elements, igniter, element circuits, and the bake element. If any part is not working properly, you must verify that there is power at the output relay of these parts. This is a live high voltage check that must be performed only by professionals. If there is no power at the out relay, you may have to replace the board.

Safety Valve

Also called the gas valve, this valve ensures that gas is not released until the correct temperature required to ignite the gas is reached. If the surface igniter does not glow, you can start by verifying that there is power to the circuit. If the voltage is lost at the terminals, you must check the continuity of the bi-metal in the safety valve using a multi – meter.

Oven Burner Igniter

Hot surface or oven burner igniter is used by oven burners to open the gas valve and ignite the gas. This fragile igniter comes in both round and flat styles. If the burner of the oven does not light, you must check the condition of the igniter. If you notice that the igniter does not glow, you must test the power to the circuit. You will need a multi-meter to check the condition of the circuit. This is a live high voltage test and must be performed by professionals.

Check out our other service locations in popular cities:

Louisville, New York City NY range repair, Allentown, Salt Lake City, Detroit, Atlanta GA oven repair, Sacramento CA oven repair, Baltimore, San Francisco CA range repair, Chicago, Little Rock, Dallas, Minneapolis, Denver, Phoenix AZ oven service, Nashville, Los Angeles CA oven service, Fort Worth, Olympia, Indianapolis, Middletown oven repair, St. Louis, Jackson, Charleston SC stove repair, Bowie, Portland, Boston, Columbia, Columbus, Aurora, Pittsburgh, San Jose stove repair, Everett, Las Vegas stove service, Tallahassee, Omaha, Reno City, Tampa, Austin, Albuquerque, gas stove repair New Haven, Orlando, Miami, oven repair in Jacksonville FL, Colorado Springs, Virginia Beach, Eugene, Tucson oven gas range repair, Houston, Oklahoma City, Provo, Billings, Richmond, Birmingham, Raleigh, Portland, Newark, Milwaukee, Kansas City, Providence, Manchester, Henderson, Tacoma, Seattle, Cleveland, San Antonio, Baton Rouge, Charlotte NC appliance service, Silver Spring, Lakewood, Philadelphia gas range service, San Diego CA stove service

The post How To Fix A Range Or Oven That Won’t Start appeared first on OnSite Appliance